Assembling Chickens on Rotisserie Rod
This Blog is to show
GB Gastro clients and all visitors how to assemble chickens on rotisserie rod. This method is very simple and does not involve meat piercing. First of all you need a
chicken rotisserie which you can buy from our
online shop. We offer electric and gas rotisseries from 6 up to 90 chickens.
Material below is made on rod for 3 chickens but the method is exactly the same for all sizes of the rods. You just have to continue adding chickens accordingly.
1. So we have a rotisserie and we have our chickens and rod ready.
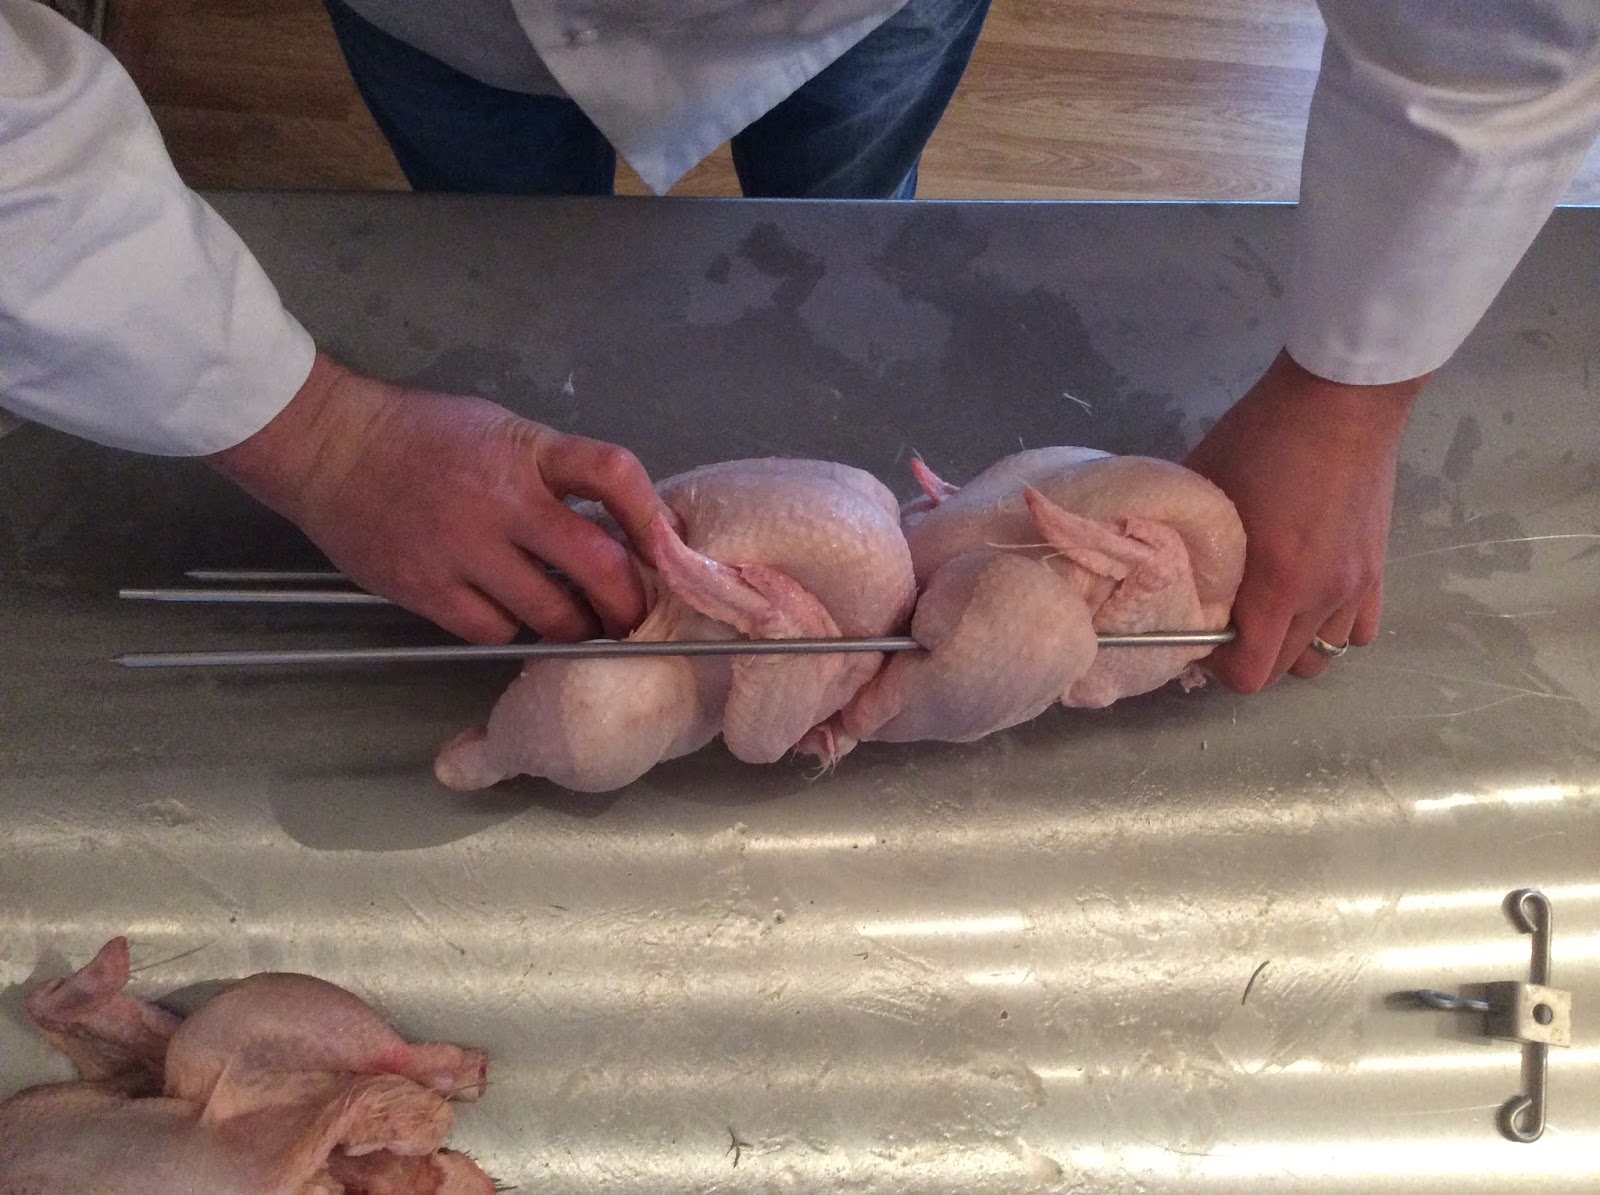
2. Slide through middle rod first chicken the way that chicken wings and legs are under the side rods.
3. Push in each wing between the rod and body.
4. Now legs.
5. Bend one leg over the side spit and then fold that leg under the middle spit.
6. Repeat that process with the other leg.
7. Gently holding legs of the first chicken slide through middle rod second chicken the way that chicken wings and legs are under the side rods.
8. Squeeze chickens tight so the legs of the first chicken are immobilised.
9. Repeat from step 1 to 6 with second chicken.
10. Repeat the process with third chicken.
11. Finish assembling by tightening up all chickens with the clip provided.
12. Chickens are ready to...
...go to one of our rotisseries.
Remember to tied chickens up on the rod before cooking. This will reduce weight loss through cooking process. You will also notice that after 30 min of grilling meat of the chickens will get firm and it will shrink a bit. This is the best time to gently spread the gaps on the rod between the chickens which will allow them to cook equally golden brown.
Happy grilling from
www.gbgastro.com!